
Get this:
Keurigs are one of the most distinct and prominent coffee brewers today. They’re super easy to use and maintain.
Altogether:
Their brewing process takes about five to seven minutes. Once you fill the water tank and turn on the machine, it begins to preheat for about three minutes.
Afterward, you can select your brew size and wait till your cup is full.
However:
This process might not always be as seamless as you’d desire. All coffee makers experience issues from time to time, and Keurigs are no exception.
For instance:
One of the major issues you could experience if you’re using a Keurig is when it gets stuck in the preheating mode. This makes it impossible for the machine to brew coffee as expected.
Though:
You don’t need to fret too much over this. Why? Because we’ve got the solution to your Keurig preheating problem that you can carry out yourself.
Keep reading to find out more!
Table of Contents
Keurig Stuck On Preheating
Typically, the Keurig preheating process should only take about three minutes tops. Once you notice your Keurig is taking far too long to finish preheating, it’s a sure sign that something is off. You can fix this by restarting the preheating process, cleaning the water nozzle, or filling the tank with hot water.
1. Restart The Preheating Process
Usually:
The preheating process begins the moment you switch on your Keurig. It’s a process that depends on your coffee maker with little or no input from you.
Here’s why:
During the preheating process, your Keurig uses its heating element to heat the water in the tank.
The preheating process ends as soon as the water is hot enough, and you can start brewing.
Of course:
The speed of the preheating process depends on the model you’re using. Regardless, the entire process takes about 20 seconds to three minutes.
So:
If your Keurig has spent more than ten minutes preheating the water in the tank, it’s a sign that something has gone haywire.
Now:
The first remedy you should try in this situation is to restart the preheating process. This is done by following these steps:
- Step 1: Switch off your Keurig.
- Step 2: Unplug it from the power source.
- Step 3: Ensure the water tank is filled to the max.
- Step 4: Wait for about thirty minutes before turning it back on.
Once you switch on your Keurig, it restarts the preheating process, and things should return to normal.
However, if this remedy doesn’t work for you, move on to the next solution explained below.
2. Clean The Water Nozzle
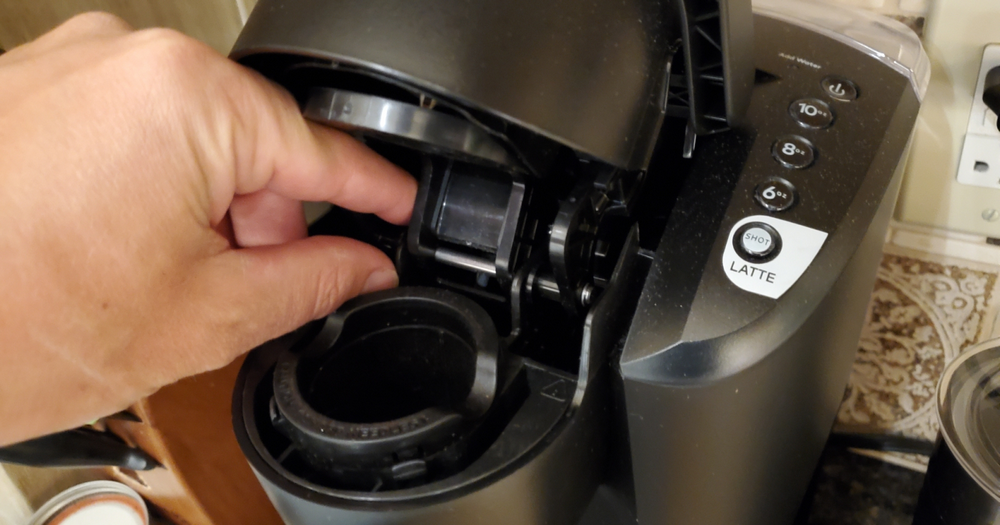
Here’s the thing:
After your Keurig finishes preheating water, it displays “Ready to Brew,” indicating that water can now pass through the water nozzle for the brewing process.
Now:
If there’s some obstruction at the entrance of the water nozzle, such as debris, water will not be able to flow through the nozzle.
As a result:
Water remains stuck, and the endless loop of preheating continues. Even if you restart the preheating process, it will not change anything.
Thus:
The only way to end the preheating process is by removing the debris clogging the water nozzle. That way, water will be able to flow through it as expected.
However:
You’ll need to be extremely cautious while doing this. Your Keurig’s needles are extremely sharp and can cause injuries.
Also:
The water that would come from the nozzle while you’re cleaning could be hot since it’s been preheated.
With this in mind:
You’ll need to have a few tools to clean the Keurig needle. You can either use the Keurig needle cleaning tool or a paper clip with one side straightened.
So:
If you’ve got the needle cleaning tool, you can safely clean the water nozzle by following these instructions:
- Step 1: Turn off your Keurig and unplug from the power source.
- Step 2: Wait for about thirty minutes before opening the lid of the machine to allow the preheated water to cool.
- Step 3: Remove used K-Cups.
- Step 4: Fill the opening of the needle cleaning tool with clean water.
- Step 5: Insert the cleaning tool into the pod holder.
- Step 6: Close the lid of the machine and wait for 20 seconds before opening it again.
- Step 7: Repeat the previous step four times.
- Step 8: Remove the cleaning tool from the pod holder.
Afterward, turn on your Keurig and run clean water through the outlet into a clean cup to completely remove any debris left.
But:
If you don’t have the needle cleaning tool, you can clean your Keurig needle with a paperclip by following these steps:
- Step 1: Turn off your Keurig and unplug from the power source.
- Step 2: Wait for about thirty minutes before opening the lid of the machine to allow the preheated water to cool.
- Step 3: Remove used K-Cups.
- Step 4: Locate your Keurig needle under the lid.
- Step 5: Locate the two holes on the Keurig needle.
- Step 6: Straighten one end of the paperclip
- Step 7: Gently insert the paperclip in one hole and dislodge debris.
- Step 8: Repeat the previous step for the second hole.
Once you’ve cleaned the needle, run clean water to eliminate the debris left.
Finally:
Once you’ve cleared the water nozzle, the heated water will flow through, and your Keurig should be able to end the preheating cycle.
3. Fill The Water Tank With Hot Water
Here’s the thing:
The moment you switch on your Keurig, it automatically begins to use its heating element to boil the water in the tank to a preset temperature.
Normally:
Your Keurig is designed with temperature sensors that inform it once the water in the tank has reached the desired temperature.
Afterward, your brewer will end the preheating process and begin to brew coffee as expected.
But:
If your Keurig remains stuck in the preheating cycle, you might need to give the temperature sensors a little shove in the right direction.
Now:
You can assist your Keurig’s temperature sensor by filling the water tank with hot water. This is done by following these steps:
- Step 1: Turn off your Keurig and wait for 30 minutes
- Step 2: Empty the water tank.
- Step 3: Boil some water in another container until it nears boiling point.
- Step 4: Fill the water tank with hot water.
- Step 5: Switch on your Keurig.
When you put your Keurig on, the sensors would immediately detect the temperature of the hot water in the tank. It would skip the preheating process and begin to brew coffee.
Duly note:
Attempting to assist your Keurig’s temperature sensor is much riskier than cleaning its sharp needles.
This is because Keurig only recommends filling the water tank with cold water.
However:
Multiple users have attempted this solution several times, and it has had a high success rate.
Model Most Affected
Currently:
Over a dozen Keurig models are being used all across the world. All models have their strong points and weaknesses.
They can all develop minor issues that result in an endless preheating cycle.
Nonetheless:
The Keurig model below has been known to experience preheating problems a lot more than others.
1. Keurig 2.0
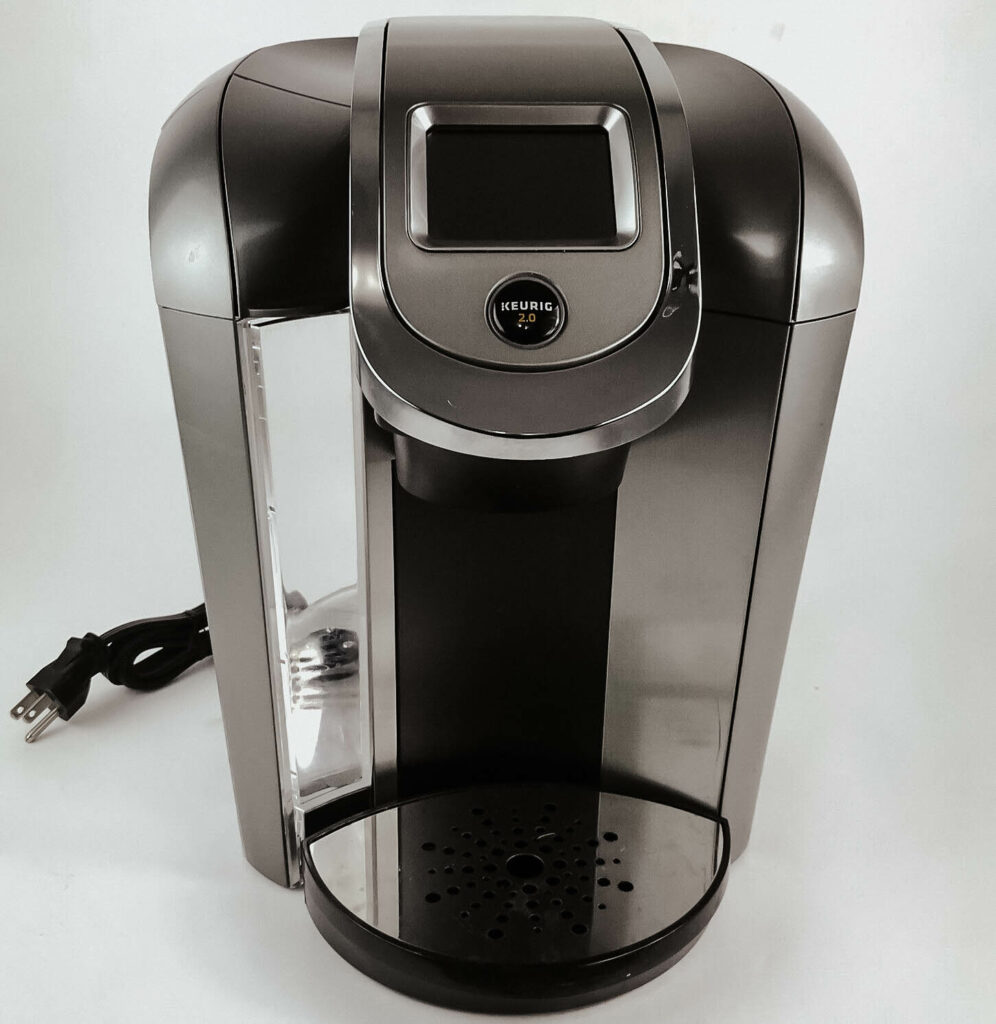
Amazingly:
When Keurig 2.0 was initially launched and distributed, it wasn’t a great hit amongst consumers.
Here’s why:
It was designed with a system that only accepted expensive K-Cups, which could only be used once. Of course, the general public didn’t find this feature attractive.
As a result:
The manufacturers decided to redesign the system after receiving harsh customer feedback. The improved system received positive reviews afterward.
However:
Despite all its improvements, the Keurig 2.0 model still has some setbacks. It experiences issues that prevent it from brewing, making full cups, and even causing the machine to leak.
Also:
It tends to fail during preheating, which causes the cycle to take much longer than expected.
Thankfully:
The preheating problem can be readily solved by following the solutions we provided earlier.
Conclusion
Overall:
Keurigs are fantastic coffee brewers with great features and a chic design.
As long as they’re properly maintained, cleaned, and descaled, you should have little or no problems with your Keurig machine.
Although:
They are liable to issues that plague most coffee makers and can develop issues that prevent them from carrying out the preheating process effectively.
Nevertheless:
You can end your Keurig unending cycle of preheating by trying out these solutions:
- Restart the preheating process.
- Clean the water nozzle.
- Fill the water tank with hot water.
Your Keurig should begin to operate optimally afterward, and you can once again enjoy your rich cup of coffee.
Finally:
Which one of our simple remedies fixed your Keurig’s preheating problem? Do you have any questions or feedback about how it went? Please let us know by leaving a comment in the section below!
Frequently Asked Questions
Regardless of the model, the entire preheating process should take only three minutes.
If your Keurig is taking longer than that to heat the water in its tank, you can fix it by:
Restarting the preheating process.
Cleaning the water nozzle.
Filling the water tank with hot water.
After which, your Keurig should begin to perform properly.
If your Keurig is experiencing issues like refusing to come on or brew coffee, you will need to hard reset your coffee maker before things can return to normal.
To hard reset your Keurig, simply follow the steps below:
Step 1: Turn off your Keurig and unplug from the power source.
Step 2: Remove the water tank.
Step 3: Allow the Keurig to sit unplugged without the water tank for 30 minutes.
Step 4: Plug your Keurig and turn it on.
Step 5: Reattach the water reservoir.
After completing the last step, your Keurig will be hard reset and begin to work effectively.
Ordinarily, your Keurig will begin the preheating process once it’s switched on.
During this time, the water in the reservoir will be heated until it reaches the preset temperature. After which, your Keurig will be ready to brew.
The entire preheating process is designed to take place within three minutes. If your Keurig takes much longer than that, it means something is wrong.
Your Keurig will take a long time to preheat if the water nozzle is blocked or if the water pump is malfunctioning.